Contents
Log into your account for the first time
Once your application for care and health worker permits has been processed and authorised, you will receive a notification email from no-reply@mipermit.com confirming that a MiPermit account has been set up for you. If the notification email is not in your inbox, check your email spam folder as your email settings may have filtered the email into it.
The email invites you to login to your account using your email address and using a temporary PIN as your password. The PIN is only valid for seven days from the date of the email, after which it can no longer be used to login.
Use the PIN provided and login. When logged in you will be asked to create a password of your own choice.
After you have changed your password, we recommend immediately setting up a colleague as a joint account manager so they can update the account in your absence or should you leave your position. This is simple to set up. Go to the set up a joint account manager section for instructions.
Login address for your MiPermit account
To access the MiPermit system go to https://secure.mipermit.com/devon/Application/Login.aspx
Set up staff and vehicle details
Do not use this section to update details relating to staff already set up on the account. If you need to update an existing staff member’s vehicle or time clock serial number details, go to either the update vehicle registration number section or update or add a time clock permit serial number section for instructions.
The care and health worker permit application process required confirmation of the number of staff likely to need a permit. Your account has been approved with this number set as its limit. If your account no longer allows you to add staff, it is likely to be because the account has reached the set limit. In this case, please refer to the increase account permit limit section.
Each staff member you set up will have a digital permit created for them which is valid for 12 months. The digital permit has to be renewed annually and an email reminder will be sent to the principal account manager 30 days before any permit is due to expire.
To set up staff on the account, you will need to know their first and last names, the registration number of their regular vehicle and if applicable, the registration number of a second vehicle they may use. You will also need to know the staff member’s email address and the serial number of the care and health worker time clock permit they will display in their vehicle.
NB: The Care and Health Worker time clock permit serial number can be added later if you have not yet received your allocated batch of care and health worker time clock permits from parking services.
- If you have not already done so, login to your MiPermit account.
The account main page will open displaying the menu options.
- Click on the ‘Buy Digital Permits’ menu option to display a screen like the one in the image below. You will not be asked to make an actual payment.
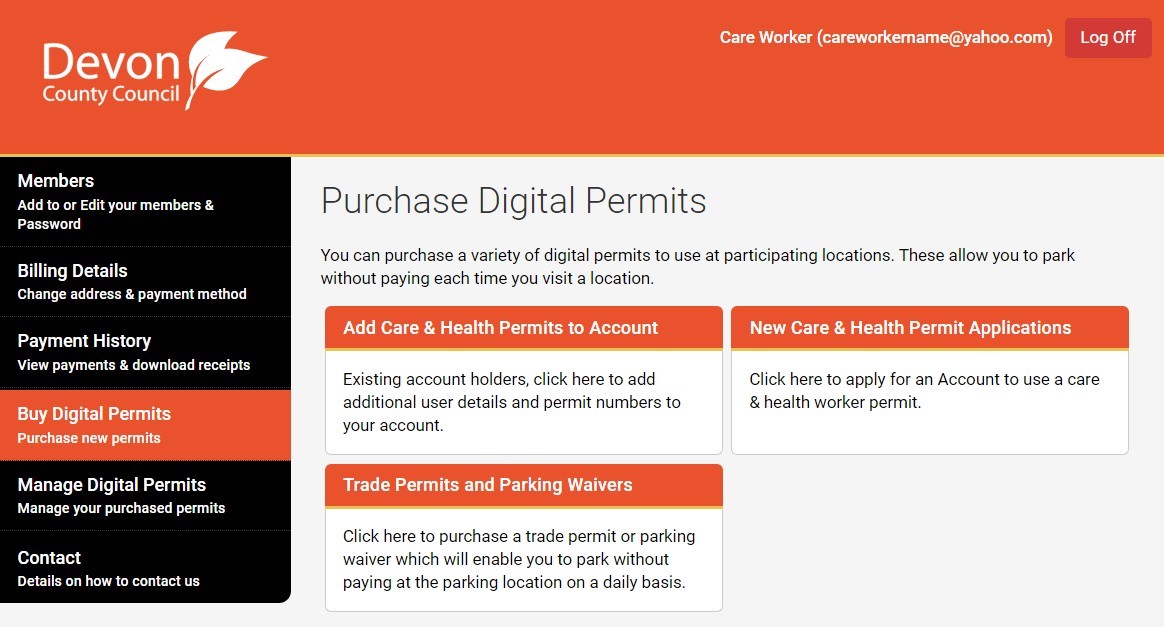
- Click on the ‘Add Care and Health Permits to Account’ option.
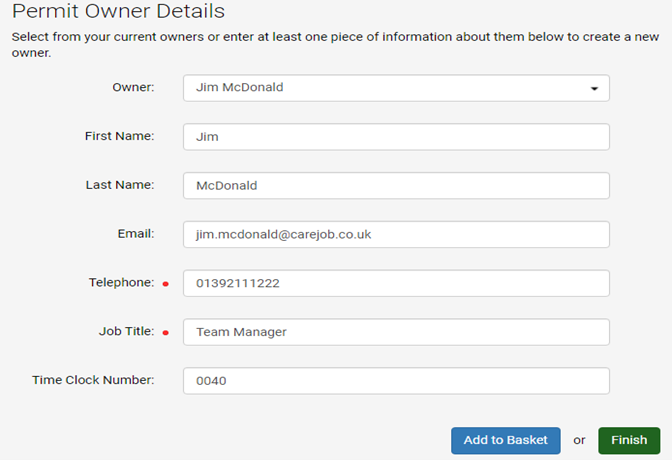
A screen like the one in the image below will open. It requires you to complete the data fields.
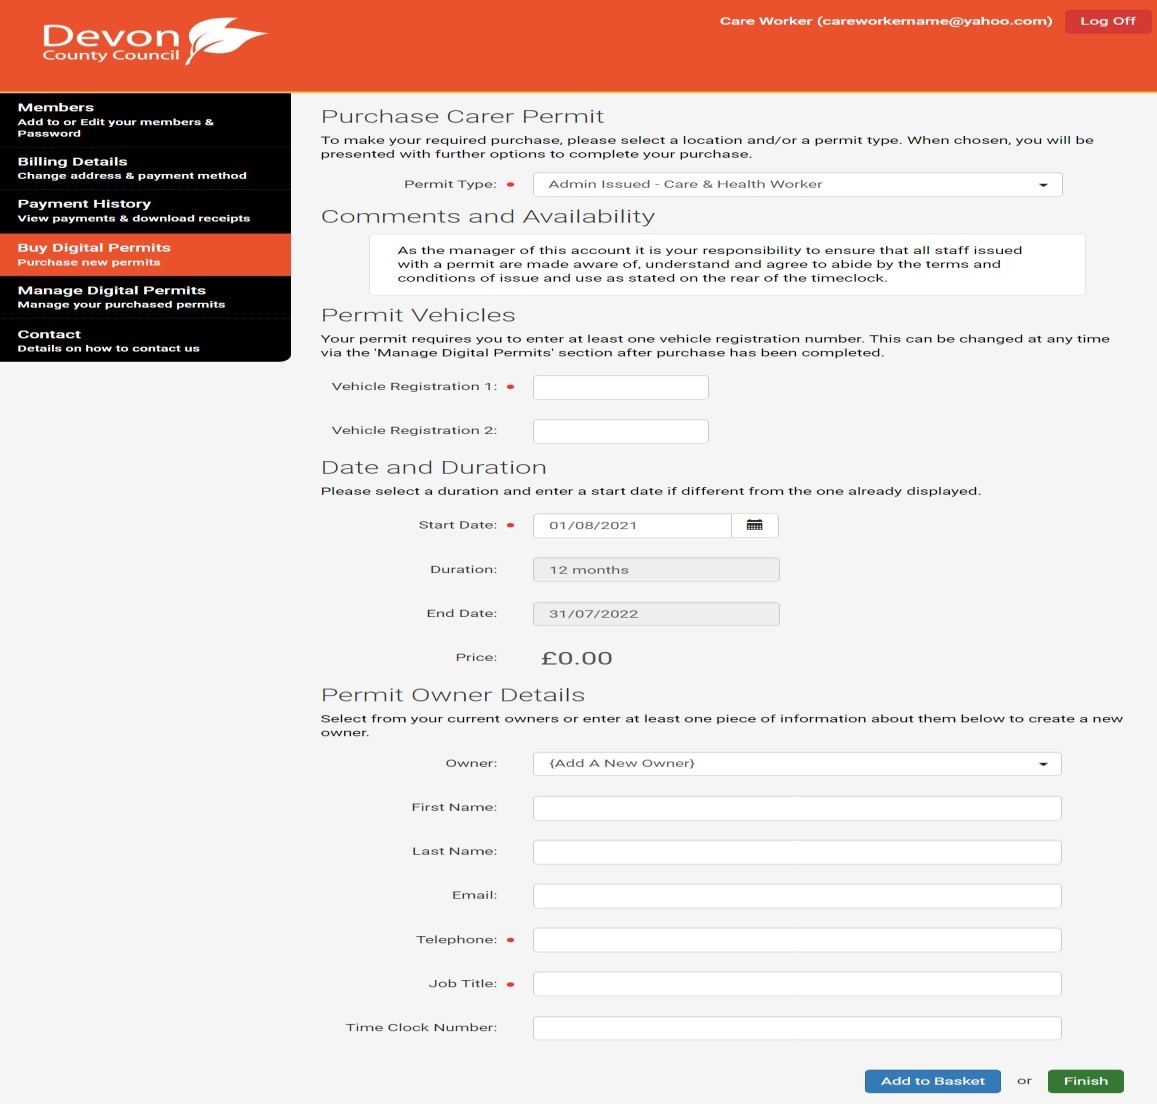
- Check that the ‘Permit Type’ data field has been set by default to ‘Admin Issued – Care and Health Worker’.
- In the ‘Vehicle Registration 1’ data field, enter the member of staff’s regular vehicle registration number.
- In the ‘Vehicle Registration 2’ data field, if applicable enter the vehicle registration number of a second vehicle the member of staff may use to visit clients.
- Set the ‘Start Date’ data field to today’s date.
- Check that the ‘Duration’ data field has been set by default to 12 months.
- Check that the ‘End Date’ data field has been set by default to 12 months from the start date.
- Set the ‘Owner’ data field to ‘New Owner’.
- In the ‘First Name’ data field enter the staff member’s first name.
- In the ‘Last Name’ data field enter the staff member’s surname.
- In the ‘Email’ data field enter the staff member’s email address.
- In the ‘Telephone’ data field, enter the work telephone number of the manager responsible for the staff member.
- In the ‘Job Title’ data field, enter the job title of the manager responsible for the staff member.
- In the ‘Time Clock Number’ data field, enter the serial number of the care and health worker time clock permit the staff member has been given to display within their vehicle (leave this data field blank if you have not yet received your allocated batch of permits).
- If you do not need to set up any further staff and vehicle details, click on the ‘Finish’ button and proceed to the ‘Billing and Postal Address’. If you need to set up further staff and vehicle details, click on the ‘Add to Basket’ button.
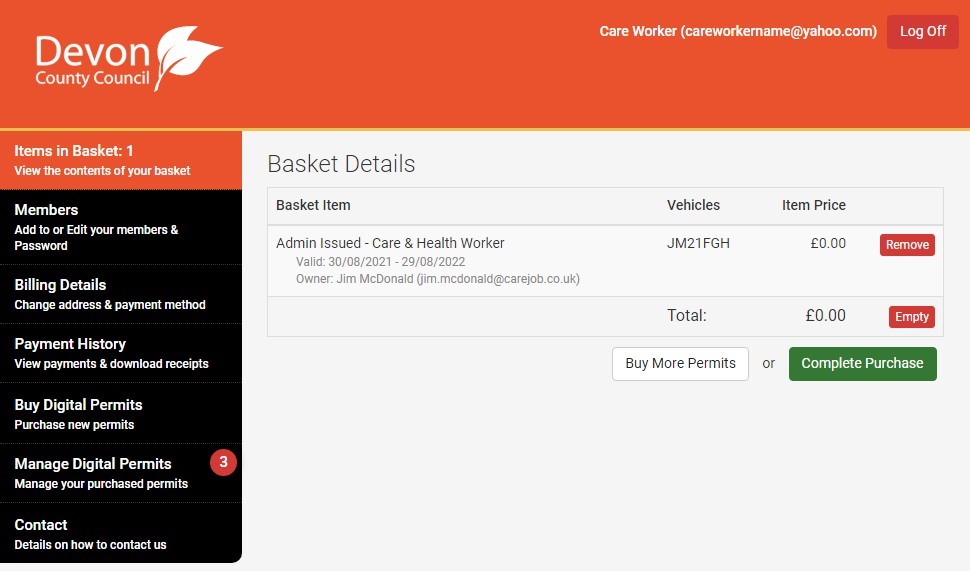
A screen like the one in the image below will open and display the staff member details that were added to the basket and invite you to buy more permits.

NB: Be aware that inactivity may cause the screen to time out. If this occurs, you may lose any staff details you added to the basket and you will have to log in again and start over.
- Click on the ‘Buy More Permits’ button.
A screen like the one in the image below will open.
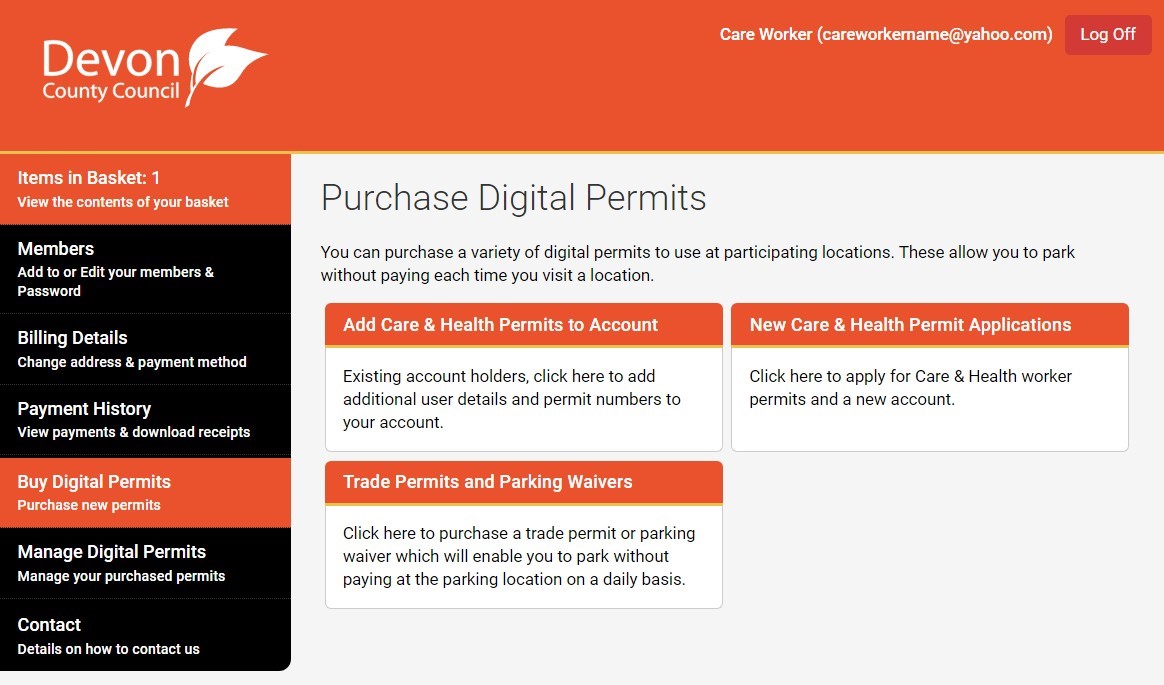
- Click on the ‘Add Care and Health Permits to Account’ option.
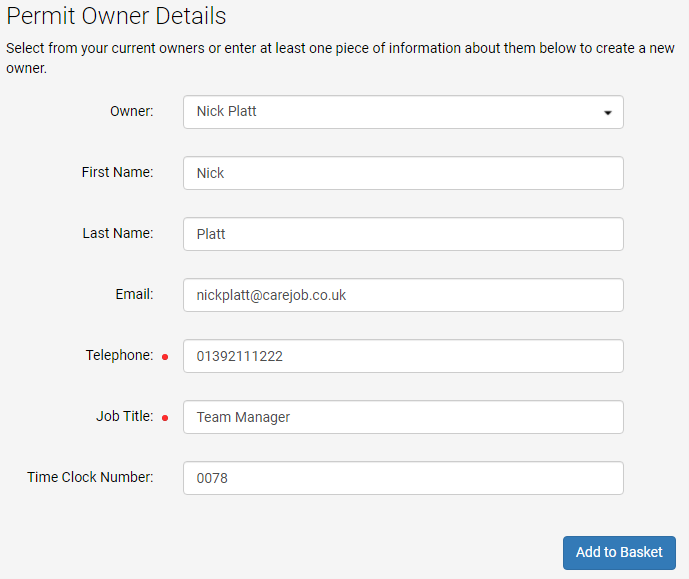
The screen requiring a staff member’s details to be entered will once again appear.
- Complete the data fields as before.
- Click on the ‘Add to Basket’ button. Repeat the actions given above on this page until the basket contains the required number of staff.
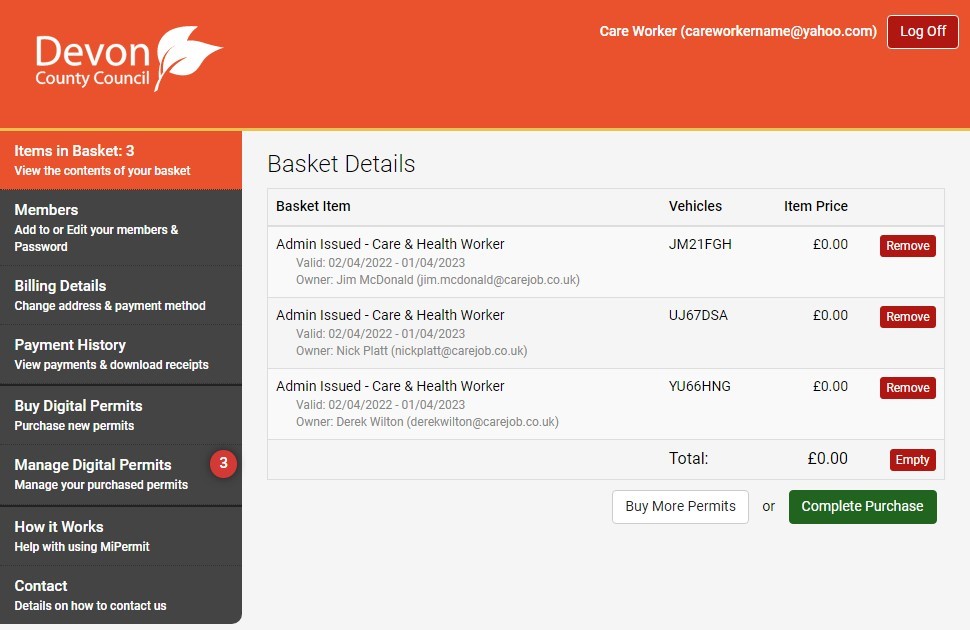
The basket details screen will look similar to the screen in the image below.

- Click on the ‘Complete Purchase’ button.
The screen will now display the “Billing and Postal Address” details for the account. The address shown should be where the principal account manager is based and the delivery address of the care and health worker time clock permits. If any of the details shown are incorrect, click on the ‘Edit Billing Address‘ button and edit the details accordingly. When satisfied that the “Billing and Postal Address” details are correct:
- Click on the ‘Complete Purchase’ button located in the payment area of the screen, as shown in the image below.
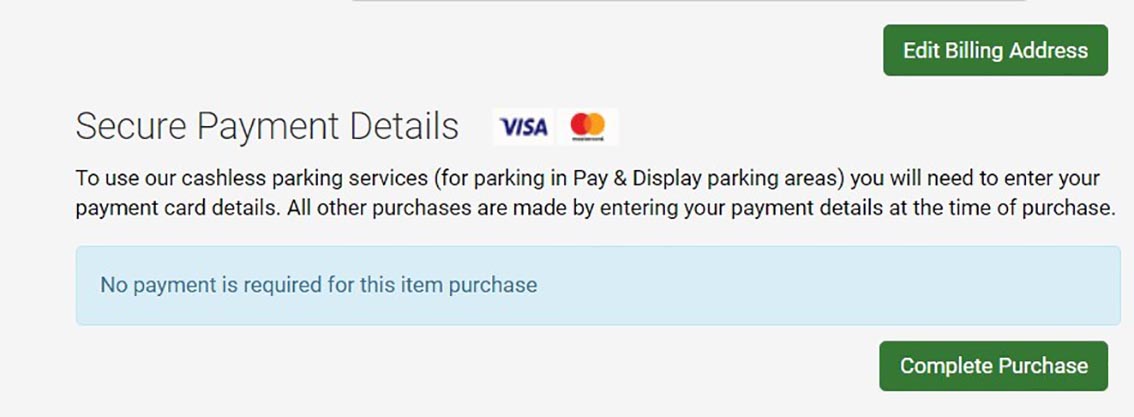
A screen like the one in the image below will open confirming your purchase and although permits are currently free of charge, a receipt for £0.00 is sent to the email address recorded in the account billing details.
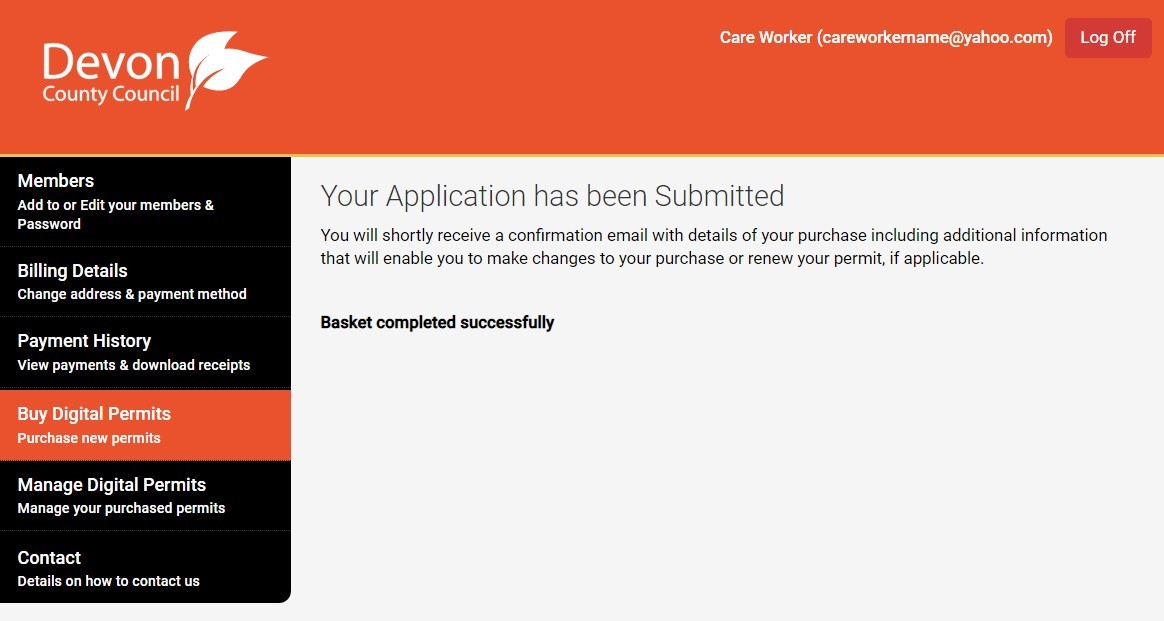
The staff members’ details have now been set up on the account. You should ask all staff issued with a care and health worker time clock permit to keep you updated with any change of vehicle or time clock permit serial number so that you can keep the account updated by editing their details.
NB: If you fail to correctly set up or update staff and vehicle details, it may result in staff receiving a £70.00 or £50.00 parking penalty charge notice
Update a vehicle registration number
When a member of staff notifies you that they have changed their vehicle, you must update the staff member’s vehicle details as soon as possible otherwise the vehicle will not be recognised as a vehicle belonging to a care and health worker permit holder by the digital device our patrolling enforcement officer’s use.
If the digital device does not recognise the vehicle, the displayed care and health worker time clock permit is considered invalid, and a penalty charge notice may be issued.
- Login to your MiPermit account.
The account main page will open displaying the menu options.
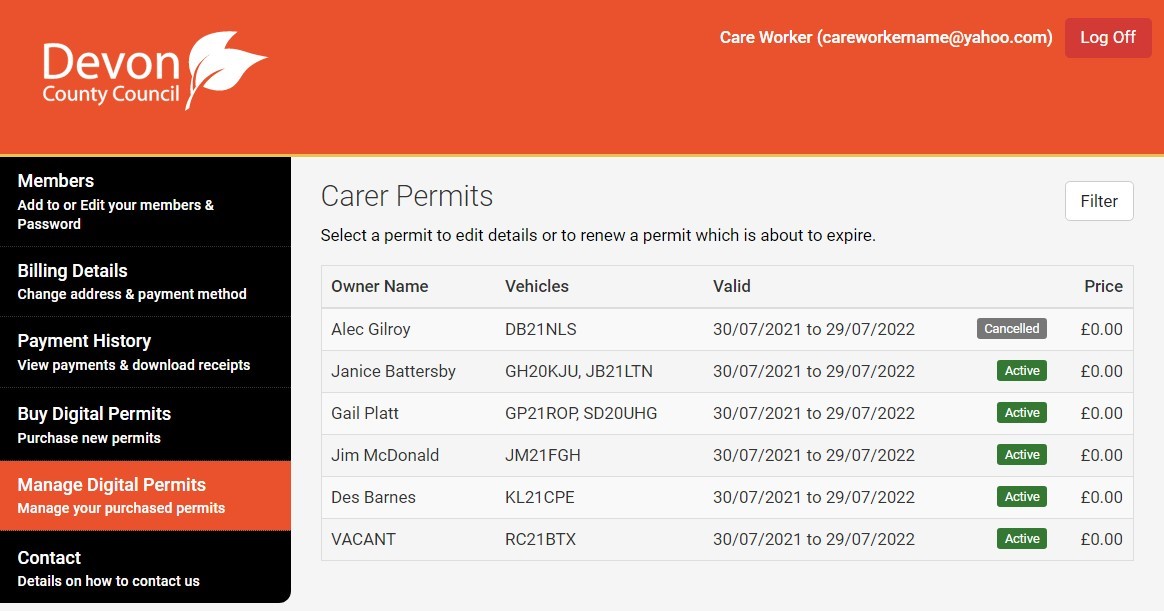
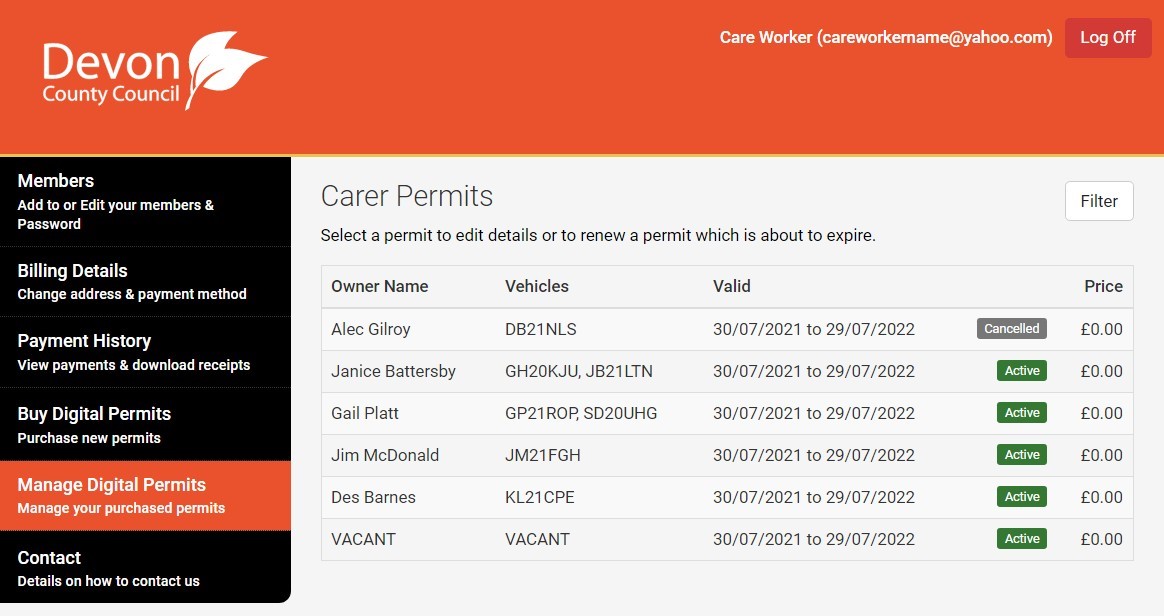
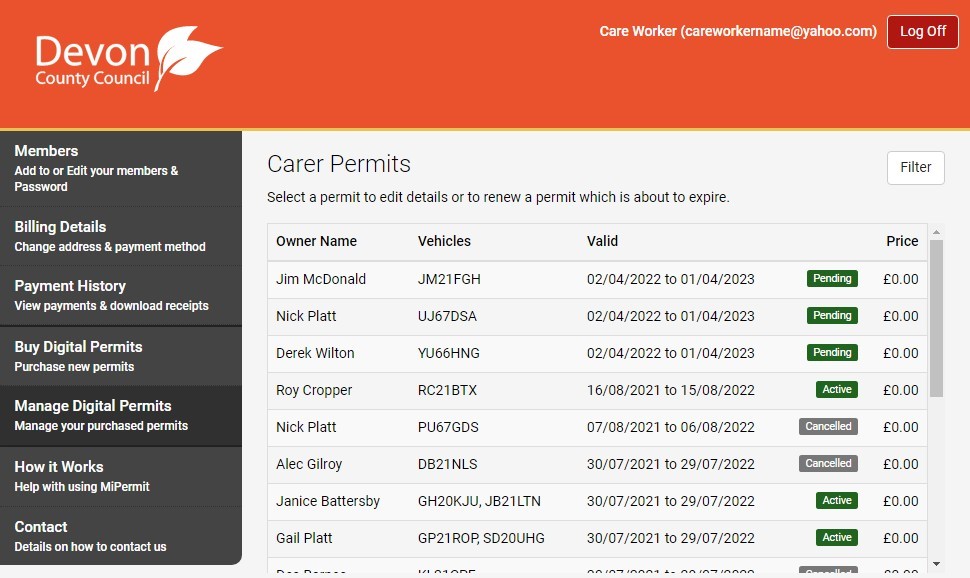
- Click on the ‘Manage Digital Permits’ menu option to display a screen like the one below where all staff set up on the account are listed.
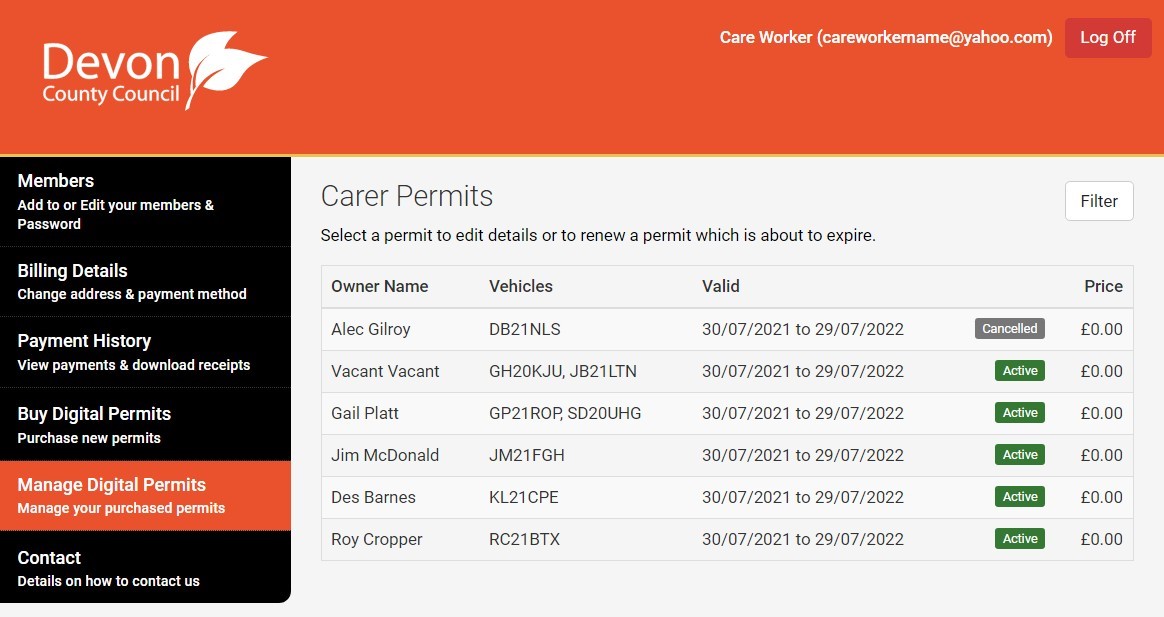
- From the list of names displayed, locate the staff member whose vehicle details require updating and check that the adjacent status shows as ‘Active’. If there are only ‘Expired’ status permits showing for the staff member, go to the permit has expired section for instructions. If the staff member has an active permit, click on it.
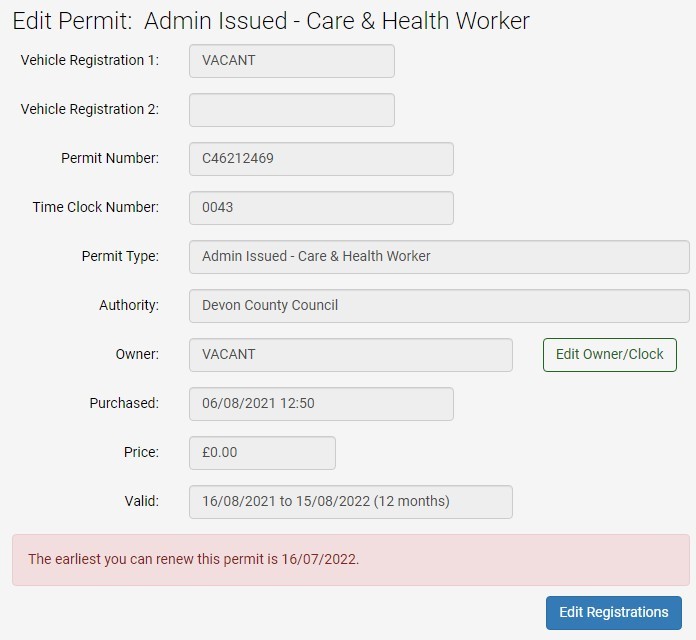
The screen will now display the ‘Edit Permit’ options like in the image below. You may need to scroll down to bring these options into view.
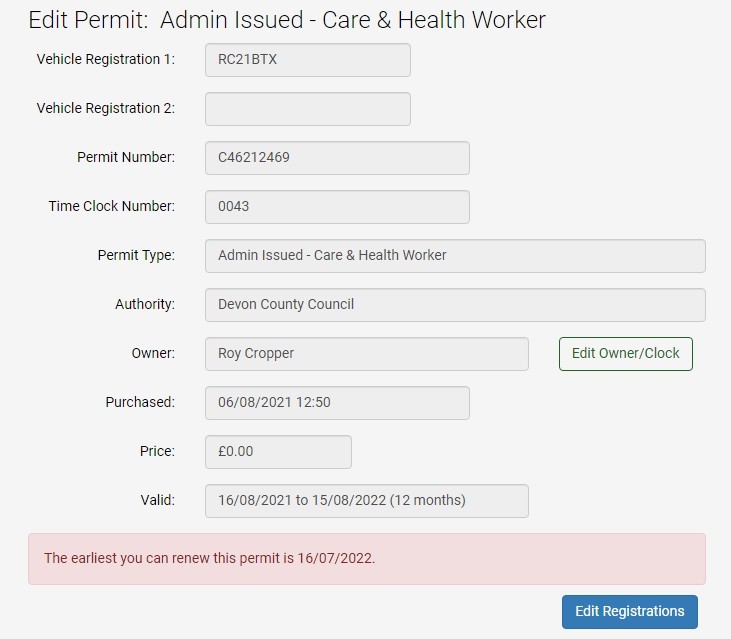
- Click on the ‘Edit Registrations’ button.
A pop-up box like the one in the image below will open.
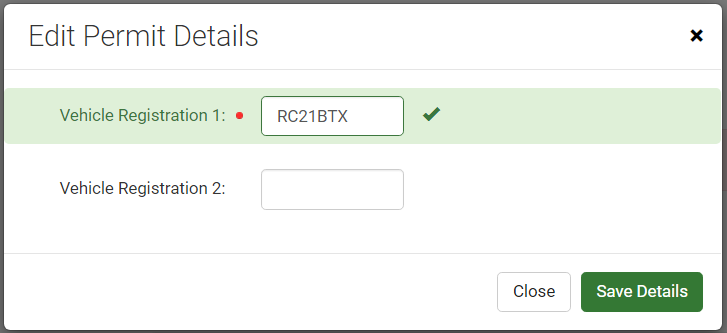
- Delete the old vehicle registration number and type in the new registration number.
- Click on the “Save Details” button.
The pop-up box will close, and you will be returned to the ‘Manage Digital Permits’ screen. The screen should now display the staff member’s new vehicle registration number next to their name.
Update or add a time clock permit serial number
- Login to your MiPermit account.
The account main page will open displaying the menu options.
- Click on the ‘Manage Digital Permits’ menu option to display a screen like the one below where all staff set up on the account are listed.
- From the list of names displayed, locate the staff member whose time clock permit serial number needs to be updated or added and check that the adjacent status shows as ‘Active’. If there are only ‘Expired’ status permits showing for the staff member, go to the permit has expired section for instructions. If the staff member has an active permit, click on it.
The screen will now display the ‘Edit Permit’ options like in the image below. You may need to scroll down to bring these options into view.
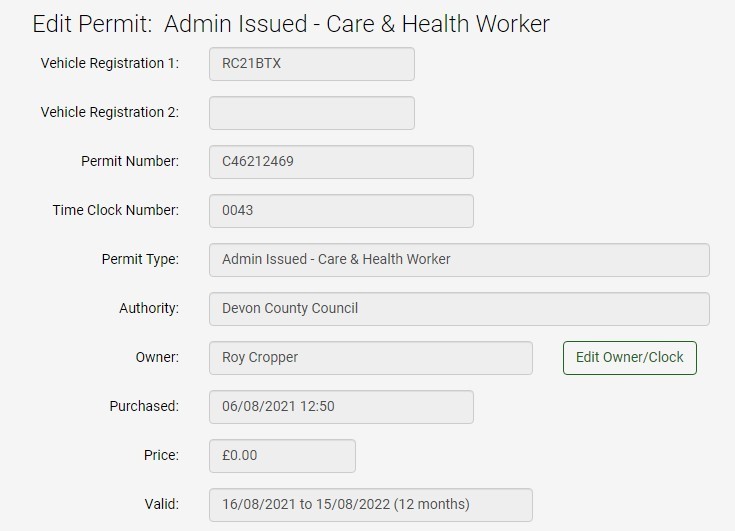
- Click on the ‘Edit Owner/Clock’ button.
A pop-up box like the one in the image below will open.
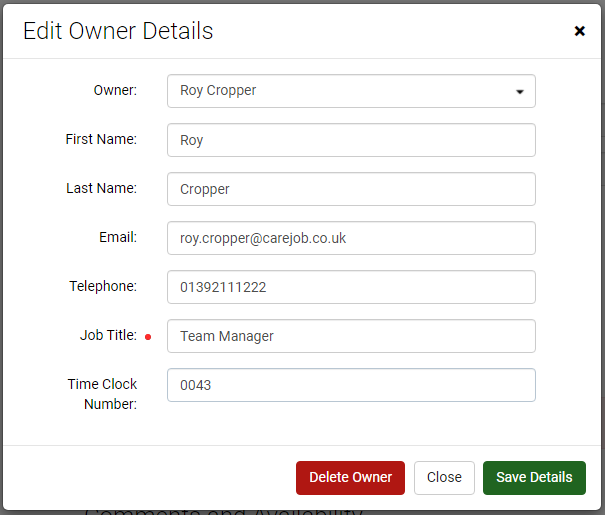
- Click in the ‘Time Clock Number’ data field and add or change the serial number of the care and health worker time clock permit that the staff member will display in their vehicle. Click on the ‘Save Details’ button.
The pop-up box will close, and you will be returned to the ‘Manage Digital Permits’ screen.
Staff member has left
If a staff member leaves or changes department and is no longer to be associated with the account, follow the instructions in this section to mark their active digital permit as vacant so that later on, if the permit has not expired, it can be assigned to another staff member.
By doing this, you are less likely to run out of available digital permits due to having reached the digital permit limit set for the account. If you want to immediately assign the active permit to another staff member, go to the use a vacant digital permit section for instructions.
- Login to your MiPermit account.
The account main page will open displaying the menu options.
- Click on the ‘Manage Digital Permits’ menu option to display a screen like the one below where all staff set up on the account are listed.
- From the list of names displayed, locate the staff member who is no longer to be associated with the account and check the adjacent digital permit status. If no active digital permits are showing for the staff member, then there is no digital permit that can be marked as vacant and utilised for later use.
- If the staff member has an active permit, click on it.
The screen will now display the ‘Edit Permit’ options like in the image below. You may need to scroll down to bring these options into view.
- Click on the ‘Edit Owner/Clock’ button.
A pop-up box like the one in the image below will open.
- Delete the name in the ‘First Name’ data field and type in ‘VACANT’.
- Delete the name in the ‘Last Name’ data field.
- Delete the email address in the ‘Email’ data field.
- Click on the ‘Save Details’ button.
The pop-up box will close, and you will be returned to the ‘Manage Digital Permits’ screen. The screen should now display ‘VACANT’ in replace of the deleted staff member’s name. Like in the image below.
The staff member’s vehicle registration also needs to be deleted.
- Click on the digital permit that is now marked ‘VACANT’.
The screen will now display the ‘Edit Permit’ options like in the image below. You may need to scroll down to bring these options into view.
- Click on the ‘Edit Registrations’ button.
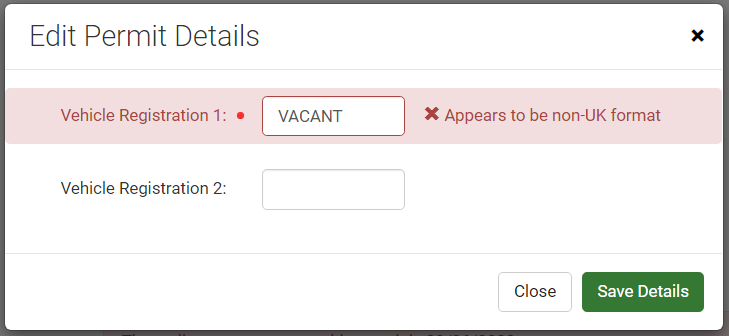
A pop-up box like in the image below will open.
- Delete all vehicle registration numbers displayed and in the ‘Vehicle Registration 1’ data field, type in ‘VACANT’. Click on the “Save Details” button.
The pop-up box will close, and you will be returned to the ‘Manage Digital Permits’ screen. The screen should now display ‘VACANT’ in replace of the deleted vehicle registration number. Like in the image below.
When a new member of staff joins and requires a digital permit to be set up, you can utilise a digital permit marked as vacant so long as its status is still showing as active. Instructions on how to utilise a vacant active digital permit is given in the next section.
Use a vacant digital permit
This section is for where you want to utilise a digital permit that has been marked vacant or the account has an active digital permit associated with a former staff member and you want to assign it to another staff member.
NB: To assign a vacant permit to a staff member you will need to know the staff member’s first and last names and the registration number of their regular vehicle and if applicable, the registration number of a second vehicle they may use. You will also need to know the staff member’s email address and the serial number of the time clock permit they will display in their vehicle.
- Login to your MiPermit account.
The account main page will open displaying the menu options.
- Click on the ‘Manage Digital Permits’ menu option to display a screen like the one below where all staff set up on the account are listed.
- From the list of names displayed, locate either the former staff member or a permit marked as “VACANT” and check the adjacent permit status is showing as active. If the status shows that the permit has expired, the permit can no longer be utilised, and you will need to go to the set up staff and vehicle details section and follow its instructions. If the status is showing as active, click on it.
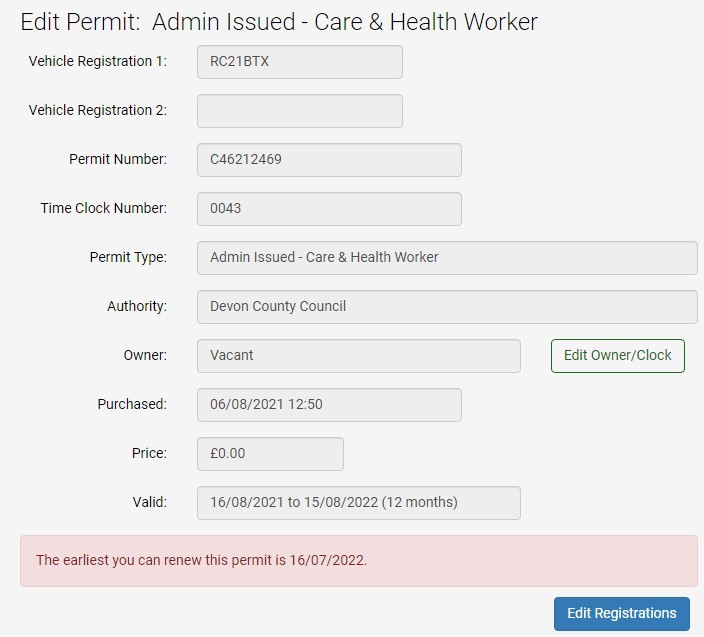
The screen will now display the ‘Edit Permit’ options like in the image below. You may need to scroll down to bring these options into view.
- Click on the ‘Edit Owner/Clock’ button.
A pop-up box like the one in the image below will open.
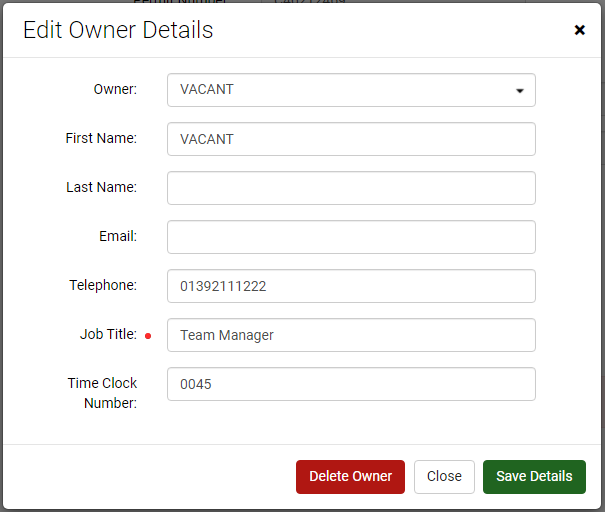
- Set the “Owner” data field to ‘Add A New Owner’ and complete or edit the other data fields in the pop-up box as necessary and click on the ‘Save Details’ button.
The pop-up box will close, and you will be returned to the ‘Manage Digital Permits’ screen.
The screen should now display the name of the staff member the permit has been assigned to.
- Click on the name of the staff member.
The screen will once again display the ‘Edit Permit’ options. You may need to scroll down
to bring these options into view.
- Click on the ‘Edit Registrations’ button.
A pop-up box like in the image below will open.
- Delete ‘VACANT’ or any vehicle registration numbers displayed and type in the registration numbers of the vehicles going to be used by the staff member you have assigned the permit to. Click on the ‘Save Details’ button.
The pop-up box will close, and you will be returned to the ‘Manage Digital Permits’ screen.
The screen should now display the name of the staff member the permit has been assigned to and their associated vehicle registration numbers.
User of company vehicle has changed
This section is for where a staff member with an active digital permit has stopped using an employer owned vehicle and the vehicle is now being used by someone else to carry out care and health work.
- Login to your MiPermit account.
The account main page will open displaying the menu options.
- Click on the ‘Manage Digital Permits’ menu option to display a screen like the one below where all staff set up on the account are listed.
- From the list of names displayed, locate the staff member who is no longer using the employer owned vehicle and check that the adjacent status shows as ‘Active’. If there are only ‘Expired’ status permits showing for the staff member, a new digital permit is required for the staff member who will be taking over use of the employer-owned vehicle. Therefore, go to the set up staff and vehicle details section for instructions. If the staff member has an active permit, click on it.
The screen will now display the ‘Edit Permit’ options like in the image below. You may need to scroll down to bring these options into view.
- Click on the ‘Edit Owner/Clock’ button.
A pop-up box like the one in the image below will open.
- In the ‘Owner’ data field, click on the down arrow to open a drop-down list of names. If the staff member who is now going to be using the employer-owned vehicle is listed, select their name and the data fields will automatically load their details. If any details are out of date, the data fields can be edited accordingly. If the staff member who is now going to be using the employer-owned vehicle is not listed, from the drop-down list select ‘Add A New Owner’ and complete the data fields fields accordingly.
- Click on the ‘Save Details’ button.
The pop-up box will close, and you will be returned to the ‘Manage Digital Permits’ screen. The screen should now display the name of the staff member next to the registration number of the employer-owned vehicle they will be using.
Renew permits due to expire
When digital permits associated with your account are shortly due to expire, when logged in to your account you will see a notification banner on the screen like the one in the image below.

In addition, 30 days before a digital permit is due to expire, an email notification will automatically be sent to the email address recorded in the account billing details to advise that your account has permits due for renewal.
- Login to your MiPermit account.
The account main page will open and displayed on the ‘Buy Digital Permits’ menu option will be a round badge indicating the number of digital permits that are due for renewal. Like in the image shown below.
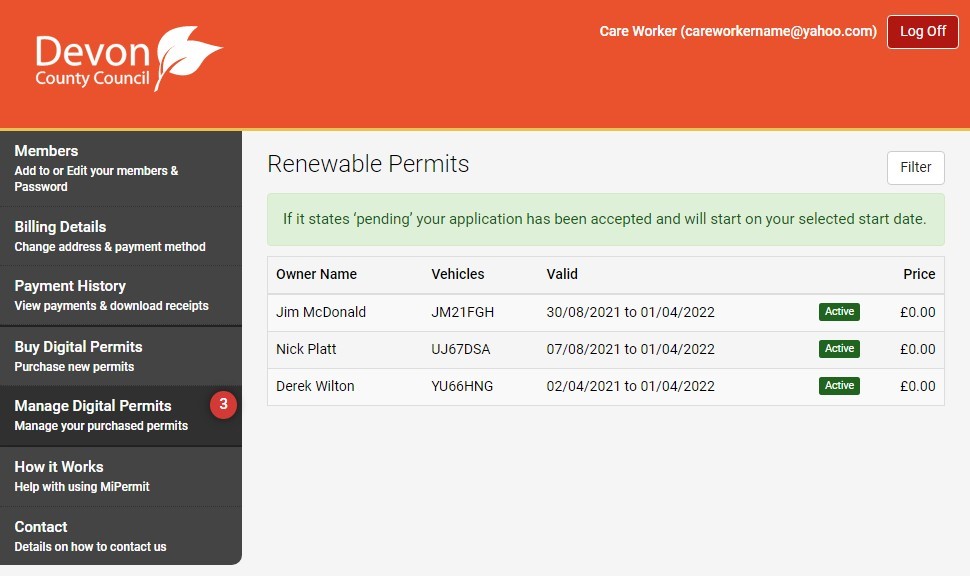
- Click on the round badge to display a screen like the one below where all staff members whose digital permits are due for renewal are listed.
NB: If any of the staff names listed are former staff members, do not renew their permit. Let the permit expire so that they no longer have an active digital permit on the account.
- Click on a staff member’s name.
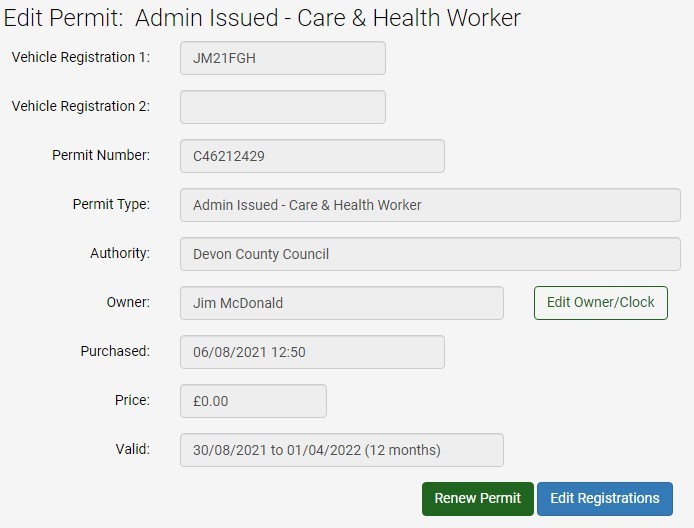
The screen will now display the ‘Edit Permit’ options like in the image below. You may need to scroll down to bring these options into view.
- Check that the data fields are displaying the correct information. If any data field is incorrect you can edit it by clicking the applicable edit button. If you require guidance on how to edit any of the data fields, go to the contents section to locate the applicable section.
- Click on the ‘Renew Permit’ button.
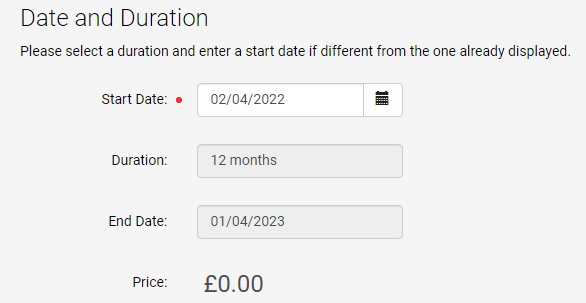
A screen will open where the start and end dates of the new digital permit are displayed in the ‘Date And Duration’ section like in the image below.
- Scroll to the bottom of the screen to bring the ‘Add to Basket’ and ‘Finish’ buttons into view like in the image below.
- If there is only one permit requiring renewal, click on the ‘Finish’ button and proceed to the ‘billing and postal address‘ guidance. If more than one permit requires renewal, click on the ‘Add to Basket’ button.
A screen like the one in the image below will open and display the staff member details that you added to the basket.
NB: Be aware that inactivity may cause the screen to time out. If this occurs, you may lose any staff details you added to the basket and you will have to login again and start over.
- Once again click on the round badge that indicates the number of digital permits that are due for renewal.
The screen listing all staff members whose digital permit is due for renewal will once again be displayed like in the image below.
- Click on the next staff member’s name.
The screen will once again display the ‘Edit Permit’ options like in the image below. You may need to scroll down to bring these options into view.

- Check that the data fields are displaying the correct information. If any data field is incorrect you can edit it by clicking the applicable edit button. If you require guidance on how to edit any of the data fields, go to the contents section to locate the applicable section.
- Click on the ‘Renew Permit’ button.
A screen will open where the start and end dates of the new digital permit are displayed in the ‘Date And Duration’ section like in the image below.
- Scroll to the bottom of the screen to bring the ‘Add to Basket’ button into view like in the image below.
- Click on the ‘Add to Basket’ button
The basket details screen will once again be displayed, and it should now contain two staff member names.
- If more permits require renewal, repeat the actions starting from ‘Once again click on the round badge’ until the basket contains all the staff member names whose digital permits are due for renewal. Remember not to renew any permits associated with former staff members.
The completed basket details screen will look similar to the image below.
- Review the basket contents and if you discover you have mistakenly added a staff member more than once or added a former staff member, use the applicable remove button to correct the basket.
- Click on the ‘Complete Purchase button.
The screen will now display the ‘Billing and Postal Address’ details for the account. The address shown should be where the principal permit account manager is based and the delivery address of care and health worker time clock permits. If the details shown are out of date, click on the ‘Edit Billing Address‘ button and edit the details accordingly. When satisfied that the ‘Billing and Postal Address’ details are correct:
- Click on the ‘Complete Purchase’ button located in the payment area of the screen, as shown in the image below. If you only renewed one permit, you may instead see a ‘Finish’ button. If so, click on it.

A screen like that shown in the image below will open confirming your purchase and although permits are currently free of charge, a receipt for £0.00 is sent to the email address recorded in the account billing details.
The round badge indicating the number of digital permits that are due for renewal should no longer be visible on the ‘Buy Digital Permits’ menu option. If it is still visible, unless the remaining permits are associated with former staff members, you should click on it and renew the remaining permits.
If you want to check that a permit has been successfully renewed you can do so.
- Click on the ‘Manage Digital Permits’ menu option to display a screen like the one below where all staff members set up on the account are listed.
If a digital permit for a staff member has been successfully renewed, there will be a new entry under their name that has the status ‘Pending’. Upon the ‘Pending’ digital permit start date, the status will change to “Active”.
NB: It is only digital permits that require renewal. The care and health worker time clock permits displayed within the vehicle do not have an expiry date. However, time clock permits are only valid when they are linked to an active digital permit.
Permit has expired
An expired permit cannot follow the renewal process. You will need to buy a new digital permit for the staff member by following the instructions in the set up staff and vehicle details section but when doing so, when entering permit owner details, in the ‘Owner’ data field, instead of setting the field to ‘Add A New Owner’, select from the drop-down list of names the staff member you require to buy a digital permit for.
The permit owner details data fields will then automatically load the details previously entered for that staff member. If any of the details shown are out of date, you can edit the data field accordingly.
Increase account permit limit
If you are attempting to buy a digital permit for a staff member and the message in the image below is showing in the ‘Date and Duration’ area of the screen. It means that the account has reached the limit of digital permits set for the account.
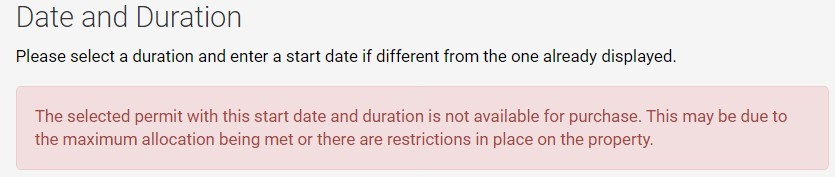
The digital permit limit may be increased on request but before making a request, you should review the digital permits active on the account to see if any of them are marked as vacant or associated with a former staff member. Active digital permits that are vacant or associated with former staff members can easily be edited and assigned to a current member of staff.
To review your active digital permits,
- Login to your MiPermit account.
The account main page will open displaying the menu options.
- Click on the ‘Manage Digital Permits’ menu option to display a screen like the one below where all staff set up on the account are listed.
Review the ‘Active’ status permits and if any have ‘Vacant’ in the name column or are associated with a former staff member, you can assign it to another staff member by going to the use a vacant digital permit section for instructions.
If after reviewing the active digital permits, none are found to be vacant or associated with former staff members, you should contact us by email to request that your digital permit limit be increased.
In your request, you must provide us with the username or telephone number you use to login to the account and confirm the company or organisation name and address registered in the account billing details.
You will also need to confirm the number of digital permits you want your limit increased by and give reasons why your current limit is insufficient. If you also need to be sent more care and health worker time clock permits to allocate to staff, you must state this clearly and confirm how many more you need.
We will post the care and health worker time clock permits to the address registered in the account billing details. Therefore, we advise you to check the account billing details are up to date before emailing us with your request. Refer to the update account contact details section if you require guidance.
Email your request to careandhealthpermits@devon.gov.uk. Please be aware that this email address is not appropriate to use if you require technical advice on managing your MiPermit account. This guide will assist with most situations you are likely to encounter but if you need further assistance, you should email help@mipermit.com for assistance.
Reset your password
- If you have not already done so, go to the login screen web page.
The login screen will look like the one in the image below.
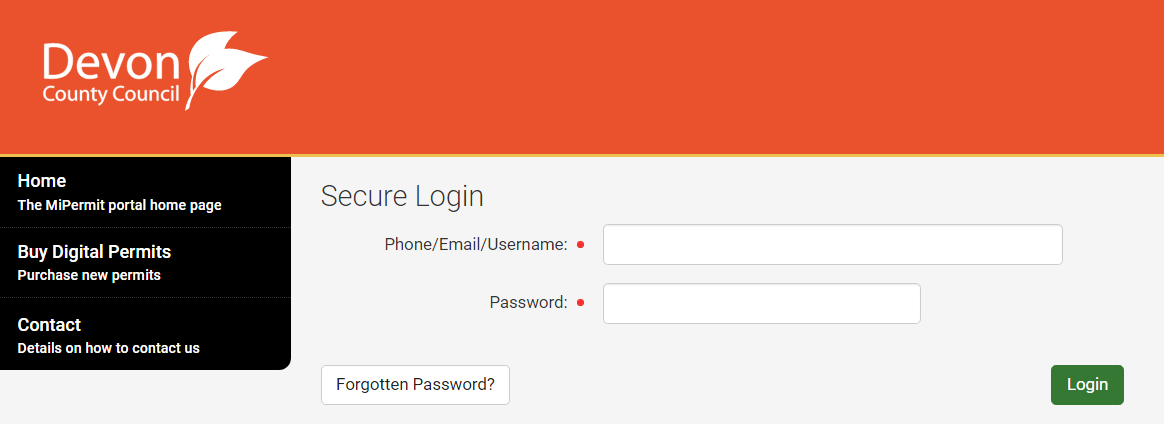
- Click on the ‘Forgotten Password?’ button.
A screen like the one in the image below will open.
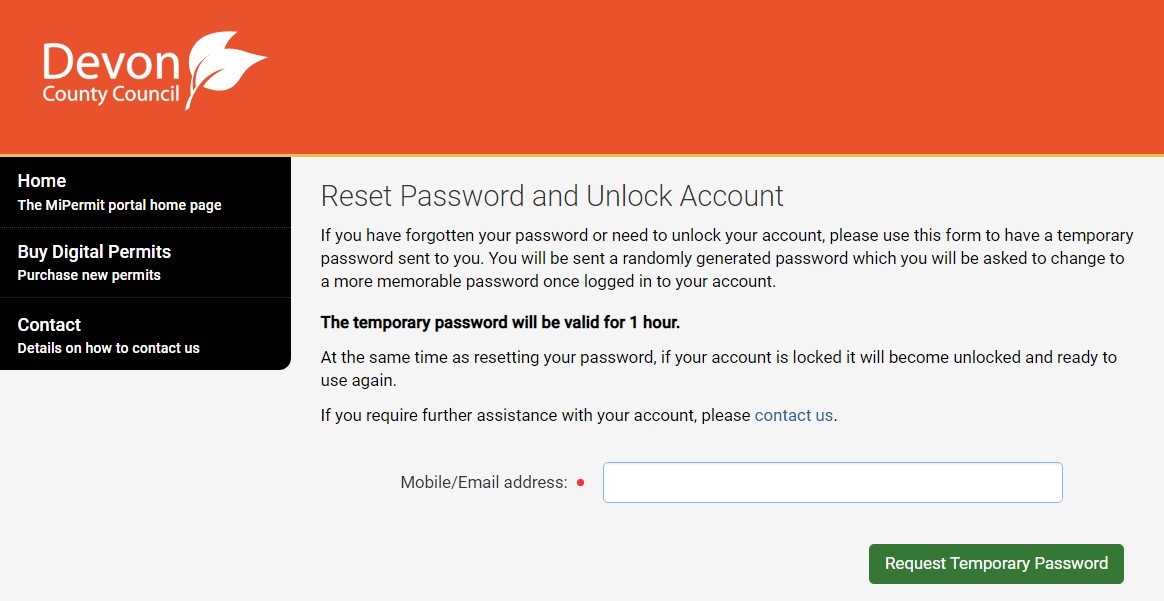
- Enter either your email address or mobile telephone number and click on the ‘Request Temporary Password’ button.
A screen like the one in the image below will open confirming a temporary PIN password has been sent.
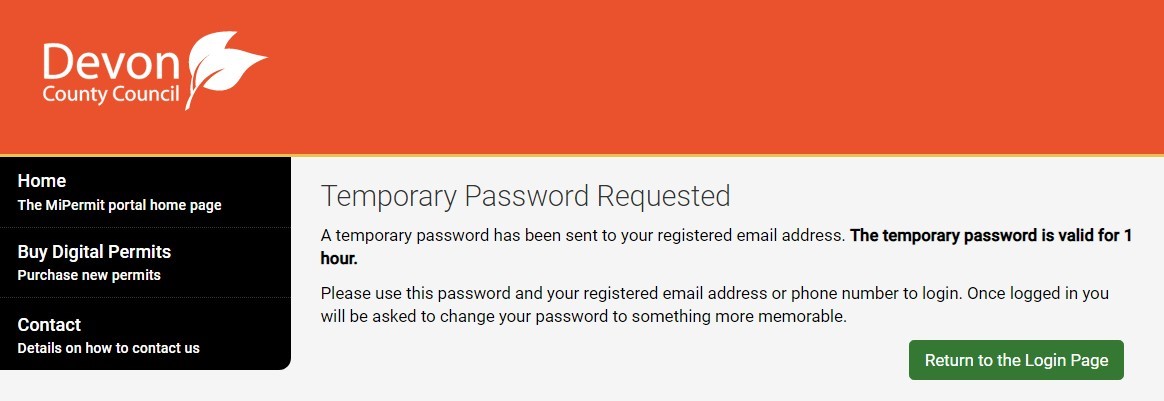
- Click on the ‘Return to the Login Page’ button.
Depending on the selected option for receipt, you will receive either an email or text message giving you a PIN to use as a temporary password. Once you login to the account using the PIN, you will be invited to enter a new password. The PIN is only valid for 1 hour from the date of the message, after which it can no longer be used to login and reset your password.
If the option chosen for receipt was email, the email will be sent from no- reply@mipermit.com. If you cannot see the email in your inbox, check your email spam folder as your email settings may have filtered the email into it.
NB: If the reset password process does not function for you and a colleague has been set up as a joint account manager, you can ask them to trigger a reset of your password by following the instructions in the reset a joint account manager’s password section.
Unlock your account
If you make three incorrect login attempts, your access to the account will be locked and the login screen will display a message like the one in the image below.

- In the login screen message, click on the ‘Please reset your PIN’ link.
A screen like the one in the image below will open.
- Enter either your email address or mobile telephone number and click on the ‘Request Temporary Password’ button.
A screen like the one in the image below will open confirming a temporary PIN password has been sent.
- Click on the ‘Return to the Login Page’ button.
Depending on the selected option for receipt, you will now receive either an email or text message giving you a PIN to use as a temporary password. Once you login to the account using the PIN, you will be invited to enter a new password. The PIN is only valid for one hour from the date of the message, after which it can no longer be used to login and reset your password.
If the option chosen for receipt was email, the email will be sent from no- reply@mipermit.com. If you cannot see the email in your inbox, check your email spam folder as your email settings may have filtered the email into it.
NB: If the unlock process does not function for you and a colleague has been set up as a joint account manager, you can ask them to unlock your account by following the instructions in the unlock a joint account manager’s account section.
Set up a joint account manager
This section concerns assigning member status to a colleague so that they can jointly manage the account.
- Login to your MiPermit account.
The account main page will open displaying the menu options.
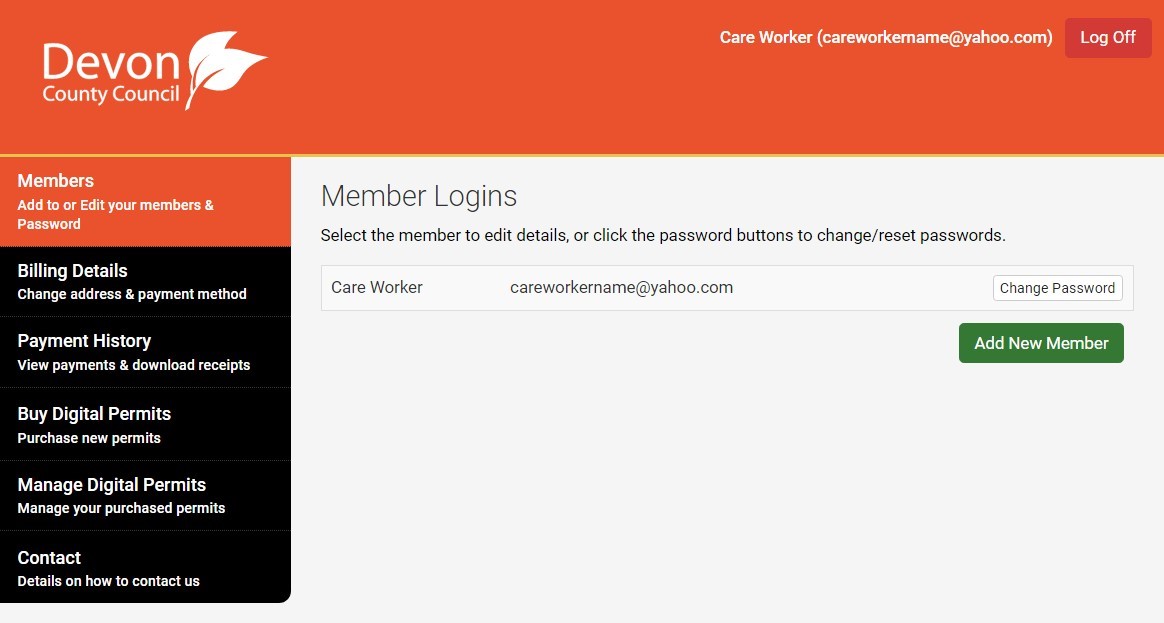
- Click on the ‘Members’ menu option to display the screen below.
- Click on the ‘Add New Member’ button to display the screen shown below.
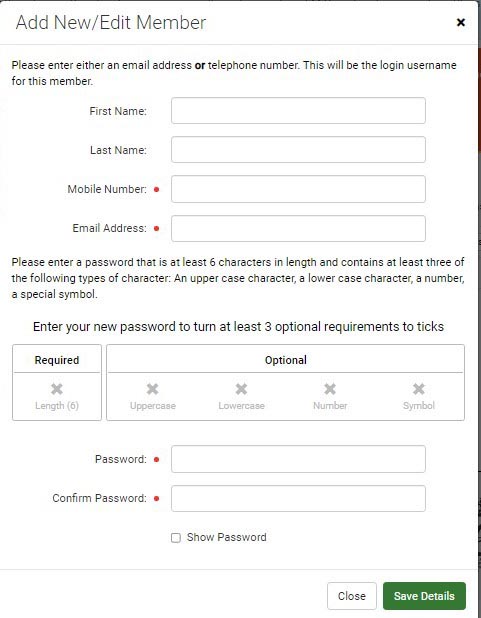
- Enter the name and contact details of the colleague you want to assign as a joint account manager and set a password for them to use in order to login to the account. Click on the ‘Save Details’ button.
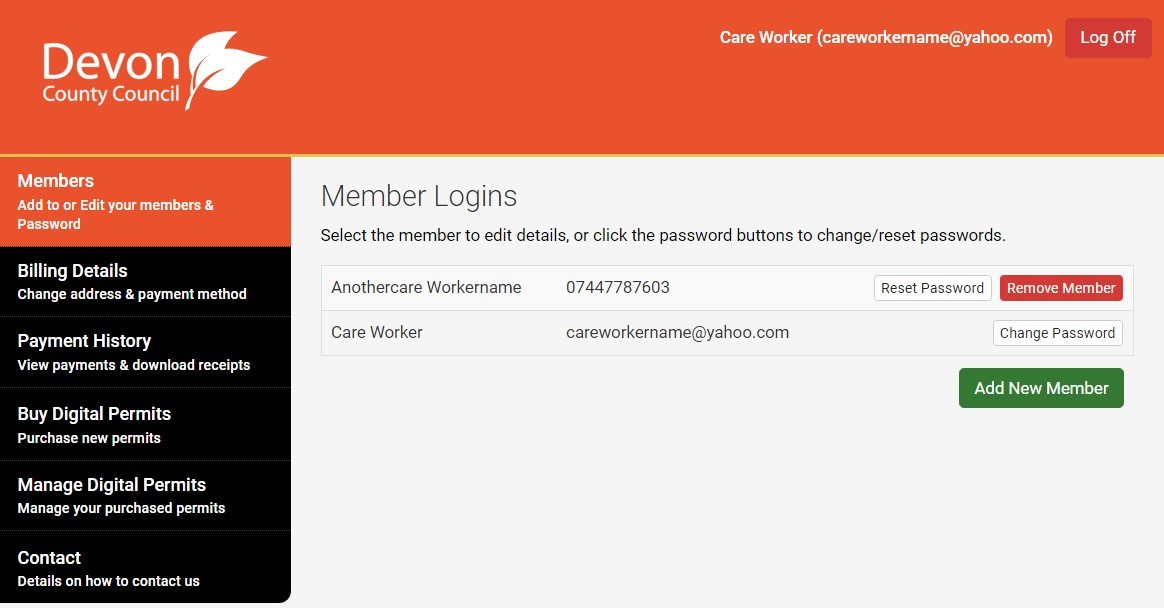
The screen will now display your name and the name of your colleague, and either their email or telephone username like in the image below.
NB: Once you have set up a colleague as a joint account manager, you will need to contact the colleague and inform them of their email and telephone usernames and password and give them the MiPermit login web page address. You should also share this user guide with them.
When the colleague logs in for the first time, they will be able to reset their password should they wish to use one different from the one you chose for them.
If a colleague given member status is no longer able to joint manage the account, you should remove them from having member status. How to do this is explained in the next section.
Remove a joint account manager
This section concerns removing member status from a person who currently has permission to assist with managing the account.
- Login to your MiPermit account.
The account main page will open displaying the menu options.
- Click on the ‘Members’ menu option to display a screen like the one below.
- From the list of member logins displayed, locate the member who is to be removed from being a joint account manager and click on the adjacent ‘Remove Member’ button.
A pop-up box will open asking you to confirm that you want to remove the selected member.
- In the pop-up box, click on the ‘Yes’ button. The pop-up box should now confirm that the member has been removed as shown in the image below.
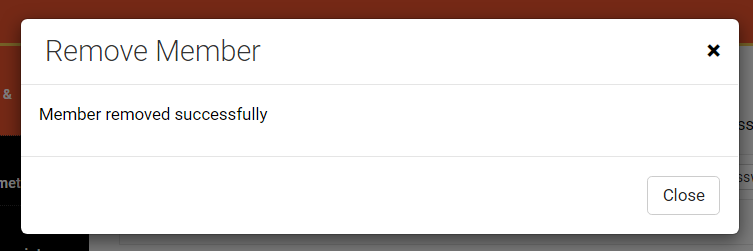
- Close the pop-up box to return to the ‘Members’ screen. The member selected for removal should no longer be listed on the screen as a member.
NB: It is recommended that you replace the removed member with someone else who can assist with managing the account. Go to the set up a joint account manager section for guidance on how to do this.
Reset a joint account manager’s password
If a joint account manager loses or forgets their password, you can login to the account and trigger a reset of their password.
- Login to your MiPermit account.
The account main page will open displaying the menu options.
- Click on the ‘Members’ menu option to display a screen like the one below.
- From the list of member logins displayed, locate the member whose password needs resetting and click on the adjacent ‘Reset Password’ button.
A pop-up box like the one in the image below will open.
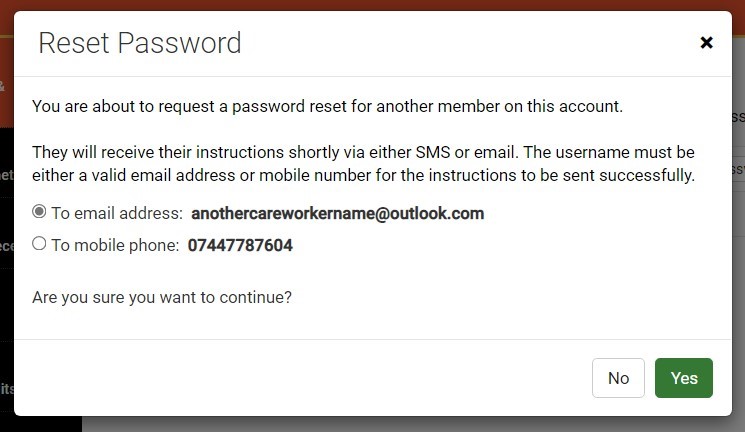
- In the pop-up box, select the appropriate option for how the member is to receive password reset instructions and then click on the ‘Yes’ button.
The pop-up box should now confirm that the member’s password reset has been successfully triggered as shown in the image below.
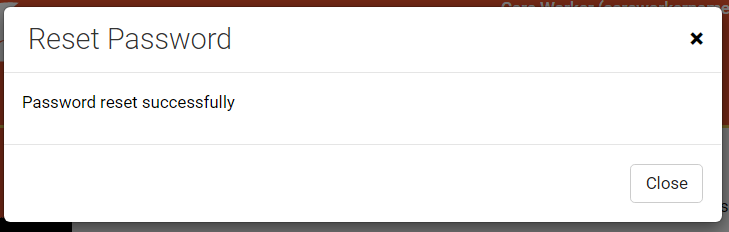
- Close the pop-up box to return to the ‘Members’ screen.
Depending on the selected option for receipt, the joint account manager will now receive either an email or text message giving them a PIN to use as a temporary password. Once they login to the account using the PIN, they will be invited to enter a new password. The PIN is only valid for one hour from the date of the message, after which it can no longer be used to log in and reset their password.
If the option chosen for receipt was email, the email will be sent from no- reply@mipermit.com. If the joint manager cannot see the email in their inbox, they should check their email spam folder as their email settings may have filtered the email into it.
Unlock a joint account manager’s account
If a joint account manager makes three incorrect login attempts, their access to the account will be locked and the login screen will display a message like in the image below.
The joint account manager can trigger the unlocking of their account by clicking on the link in the message, but should they encounter a problem, you can unlock their account for them.
- Login to your MiPermit account.
The account main page will open displaying the menu options.
- Click on the “Members” menu option to display a screen like the one below.
- From the list of member logins displayed, locate the member whose account needs unlocking and click on the adjacent ‘Unlock Account’ button. Successful unlocking is indicated by the ‘Unlock Account’ button changing to a ‘Reset Password’ button.
The member’s account is now unlocked, and they can now login to the account using their password. If they have forgotten their password you can trigger the resetting of their password by following the instructions given in the reset a joint account manager’s password section or they can trigger it themselves by following the instructions given in the reset your password section.
Update account contact details and billing details
It is important to keep the account contact details updated so that email notifications for renewing digital permits and managing the account are sent to the appropriate email address and so that if you request more care and health worker time clock permits, these will be posted to the appropriate address from where they can be allocated to staff.
- Login to your MiPermit account.
The account main page will open displaying the menu options.
- Click on the ‘Billing Details’ menu option.
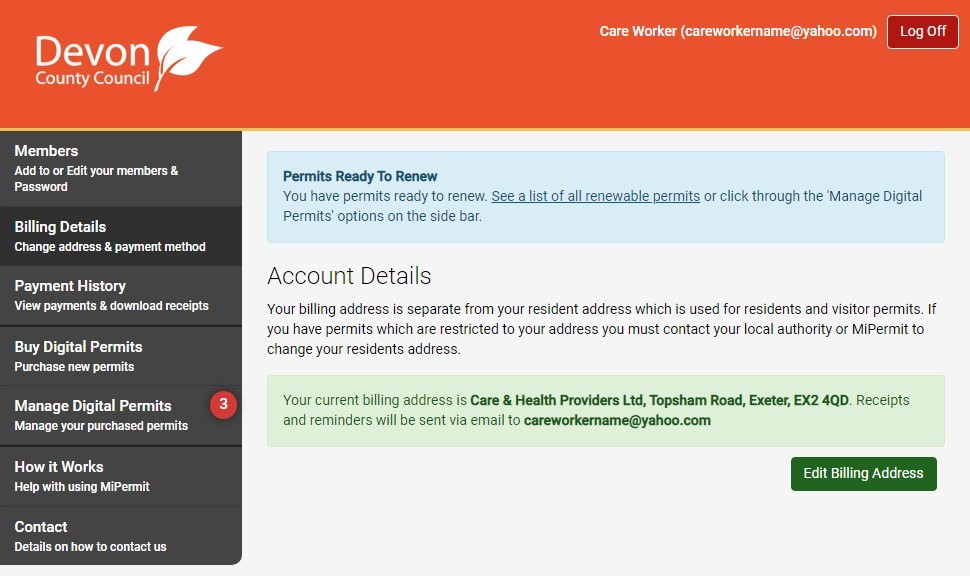
A screen like the one in the image below will be displayed.
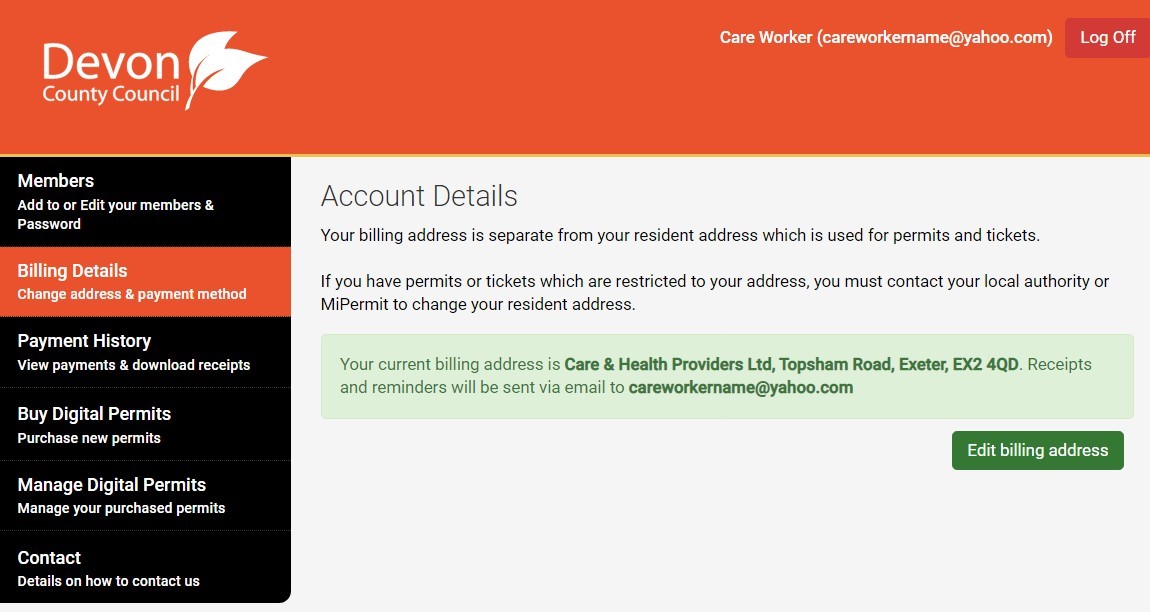
Click on the ‘Edit billing address’ button to display the ‘Account Details’ pop-up box like the one shown in the image below.
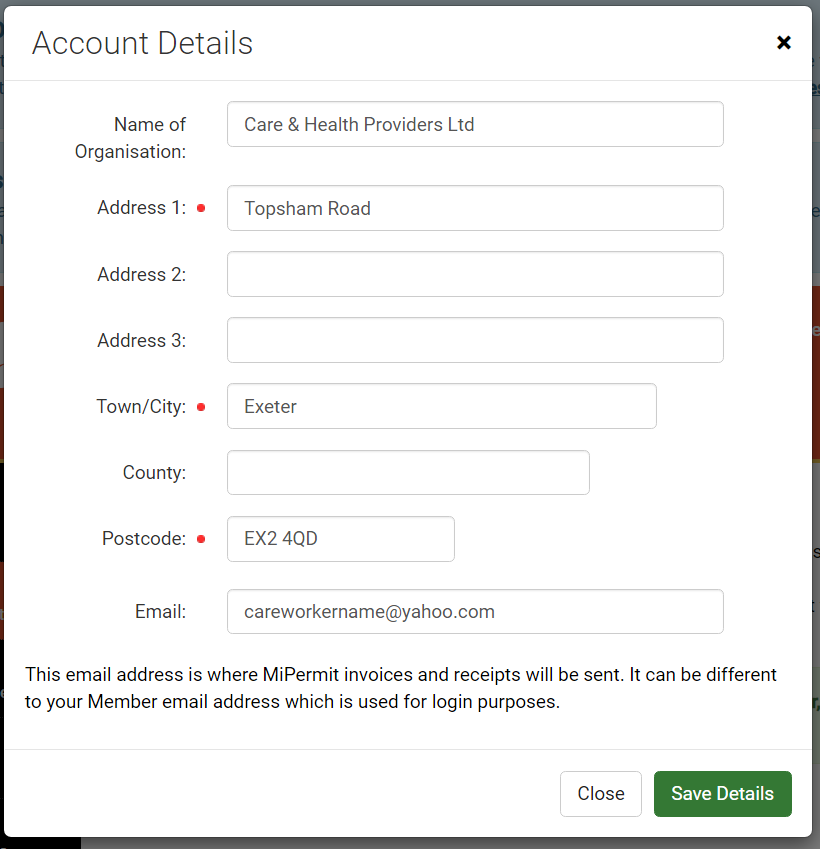
- Edit the data fields accordingly and once updated, click on the ‘Save Details’ button.
The pop-up box will close, and you will be returned to the ‘Billing Details’ menu option screen.
- Check that the displayed billing and email addresses have been updated correctly.